Advertising Options for Calendarize it!
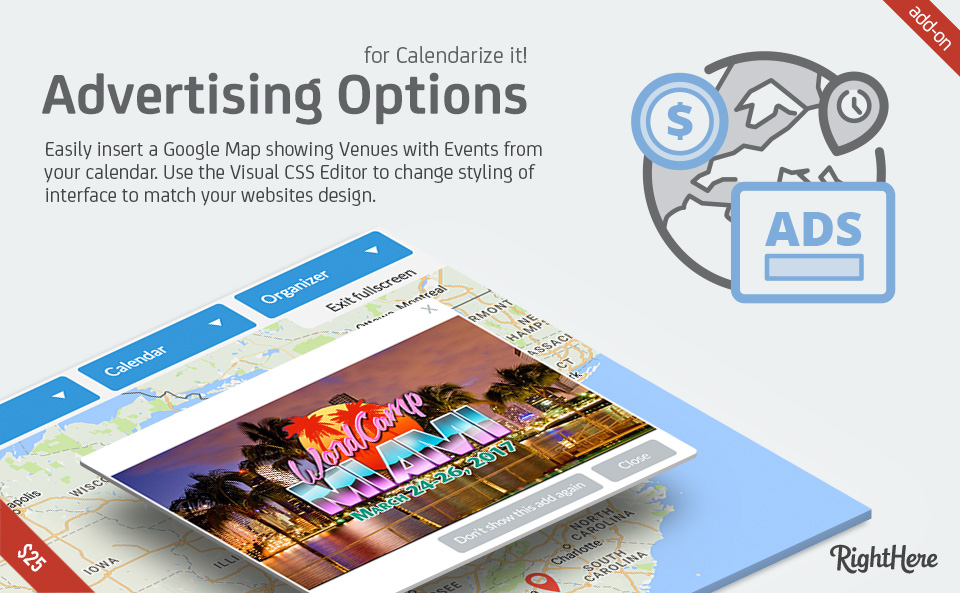
Advertising Options add-on for Calendarize it! allows you to display banner ads in the Events Map View add-on (Google Maps). The banners are triggered when the https://farmacipererezione.com/ visitor selects the Taxonomy filter assign to the ad.
If you have the Payment Options add-on you can also charge visitors for submitting banner ads through the Community Events add-on.
How to download free add-ons and purchase premium add-ons?
Enter your License Key in the Options Panel of Calendarize it! and get access to the Downloads section where you can download free add-ons and purchase premium add-ons.
The Item Purchase Code can be found in your License Certificate file. Go to Codecanyon and click on My Account at the top, then click the Downloads tab, and then click the Download button and choose the License Certificate & Purchase Code link. You will find the code in the text file and it will look something like this:
Item Purchase Code: bek72585-d6a6-4724-c8c4-9d32f85734g3
When you have entered your license key click on Downloads in the menu and you will now be able to download the free add-ons as well as purchase the premium add-ons.
Advertising Options add-on for Calendarize it!
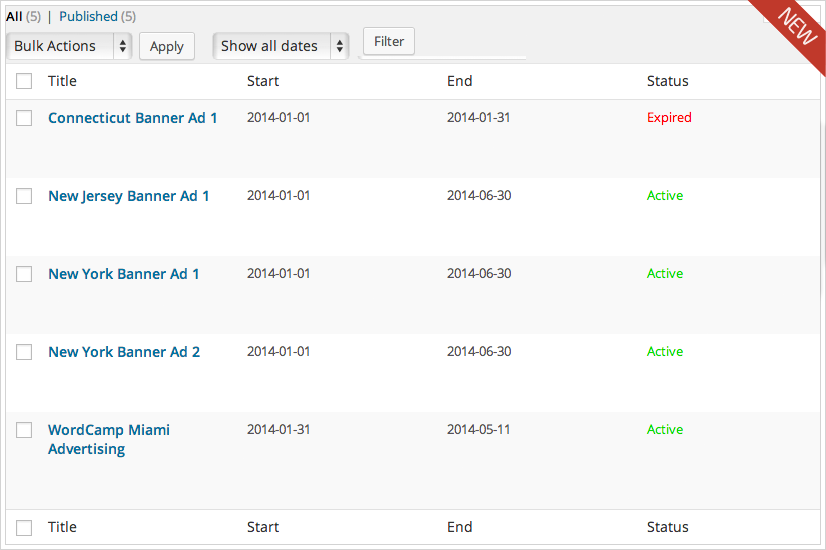
Get a quick overview of the ads created. You can easily create banner ads from within wp-admin, and if you have Community Events add-on for Calendarize it! you can also allow users to submit banners ads. Please notice that the Events Map View add-on is required in order to display the banner ads.
In the Calendarize it! Options panel you can enable the Taxonomies that you want to use to trigger the ads. By default the ad is only going to be an image, but you can change this setting to allow post content for a more advanced approach.
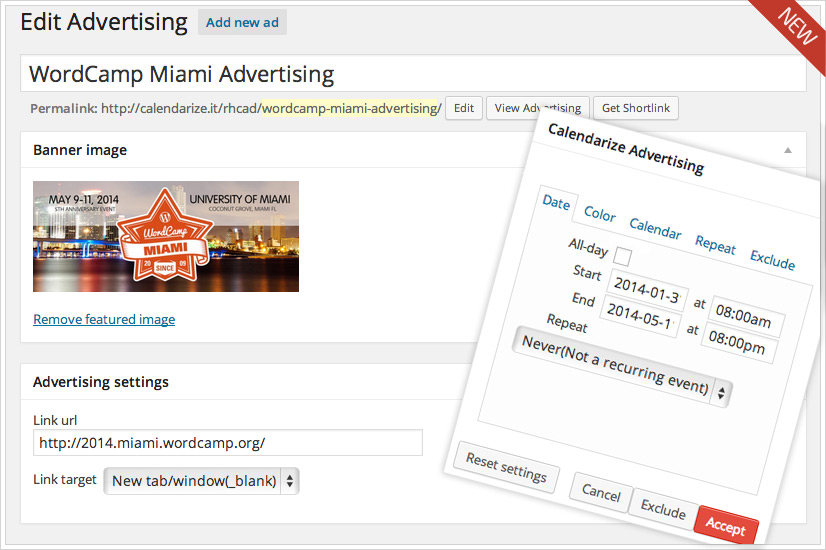
 Add the banner image directly from the Media Library or upload your image. In the Media Settings tab under Community Events add-on you will be able to set the Max Upload Size (KB) for the banner image and you can add a label showing the recommended size for the banner in pixels.
Add a link URL to the banner image, which is the destination that the visitor will be taken to when clicking on the banner. The Link URL should be absolute (the full URL). Set the link target to either Same tab/window or New tab/window.
Select when you want the banner ad to go live and when you want it to expire, simply by clicking the calendar and set the Start and End. You can set it to All day or set a specific Start time and End time.
A banner ad is triggered when a visitor click on and select one of the Taxonomies that you have assigned to the banner ad. You must at least assign one of the Taxonomies to the banner ad otherwise it will not get triggered.
The default Taxonomies in Calendarize it! is: Calendars, Organizers and Venues. However if you have the Capabilities and Taxonomies add-on you can create custom Taxonomies, which can also be used as filters in the Events Map View.
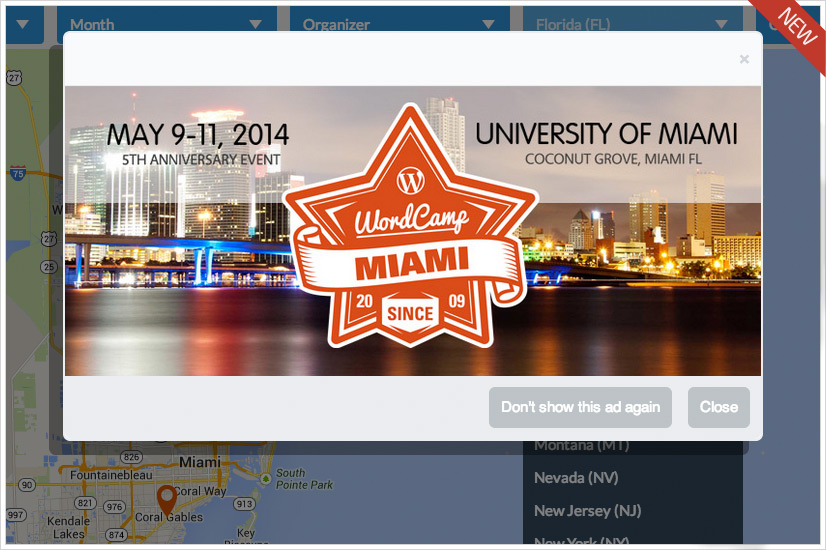
The image below shows the banner ad being triggered when the user selects the Taxonomy Florida (FL). If the visitor click the CLOSE button, the next ad will trigger according to the delay set. If the visitor click Don’t show this ad again button the specific ad will not be displayed again, and if there is another ad in the queue it will be triggered.
Change log
Version 1.0.5.54647 – November 3, 2014
- Bug Fixed: Disappearing Options Tabs
- Bug Fixed: Advertising URL not saving
Version 1.0.4 rev53417 – August 25, 2014
- Bug Fixed: Disappearing Options tab
Version 1.0.3 rev48411 – April 2, 2014
- Bug Fixed: When using the show_ad argument, ads are being triggered when date filter is used
Version 1.0.2 rev47803 – March 10, 2014
- New Feature: Display ads by adv_category its the show_ad=’slug’ argument in the Calendarize it! shortcode.
- Update: Change label to ads category
- Update: Add category to ad list
Version: 1.0.1 rev47325 – February 14, 2014
- Bug Fixed: Change “Add files” button to anchor. When clicking “Add files” in Firefox it reloaded and lost the ID.
Version 1.0.1 rev452522 – January 23, 2014
- First Release