Many of our customers using Calendarize it! and Community Events have asked us for alternatives to Stripe.com and PayPal.com for processing payments when submitting events.
We are happy to announce the release of Payment Options WooCommerce for Calendarize it!
Take payments with the provider that’s right for you – choose from 100+ payment gateways for WooCommerce.
Get started with Payment Options WooCommerce
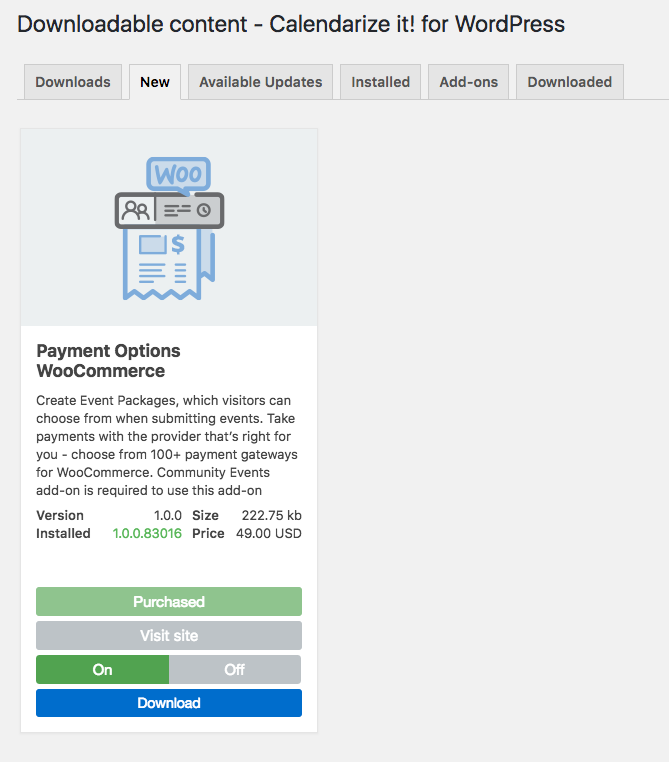
You can access our Premium paid and Free add-ons from the Downloads menu in Calendarize it! on the website where you have installed Calendarize it!
Make sure you have entered the Item Purchase Code from Codecanyon for Calendarize it! in the Options > License tab.
In order to use the Payment Options WooCommerce add-on, you need the Community Events add-on. When you have completed the purchase process the license key for the add-on is automatically inserted into the Options > License tab. Download the add-on and turn it ON.

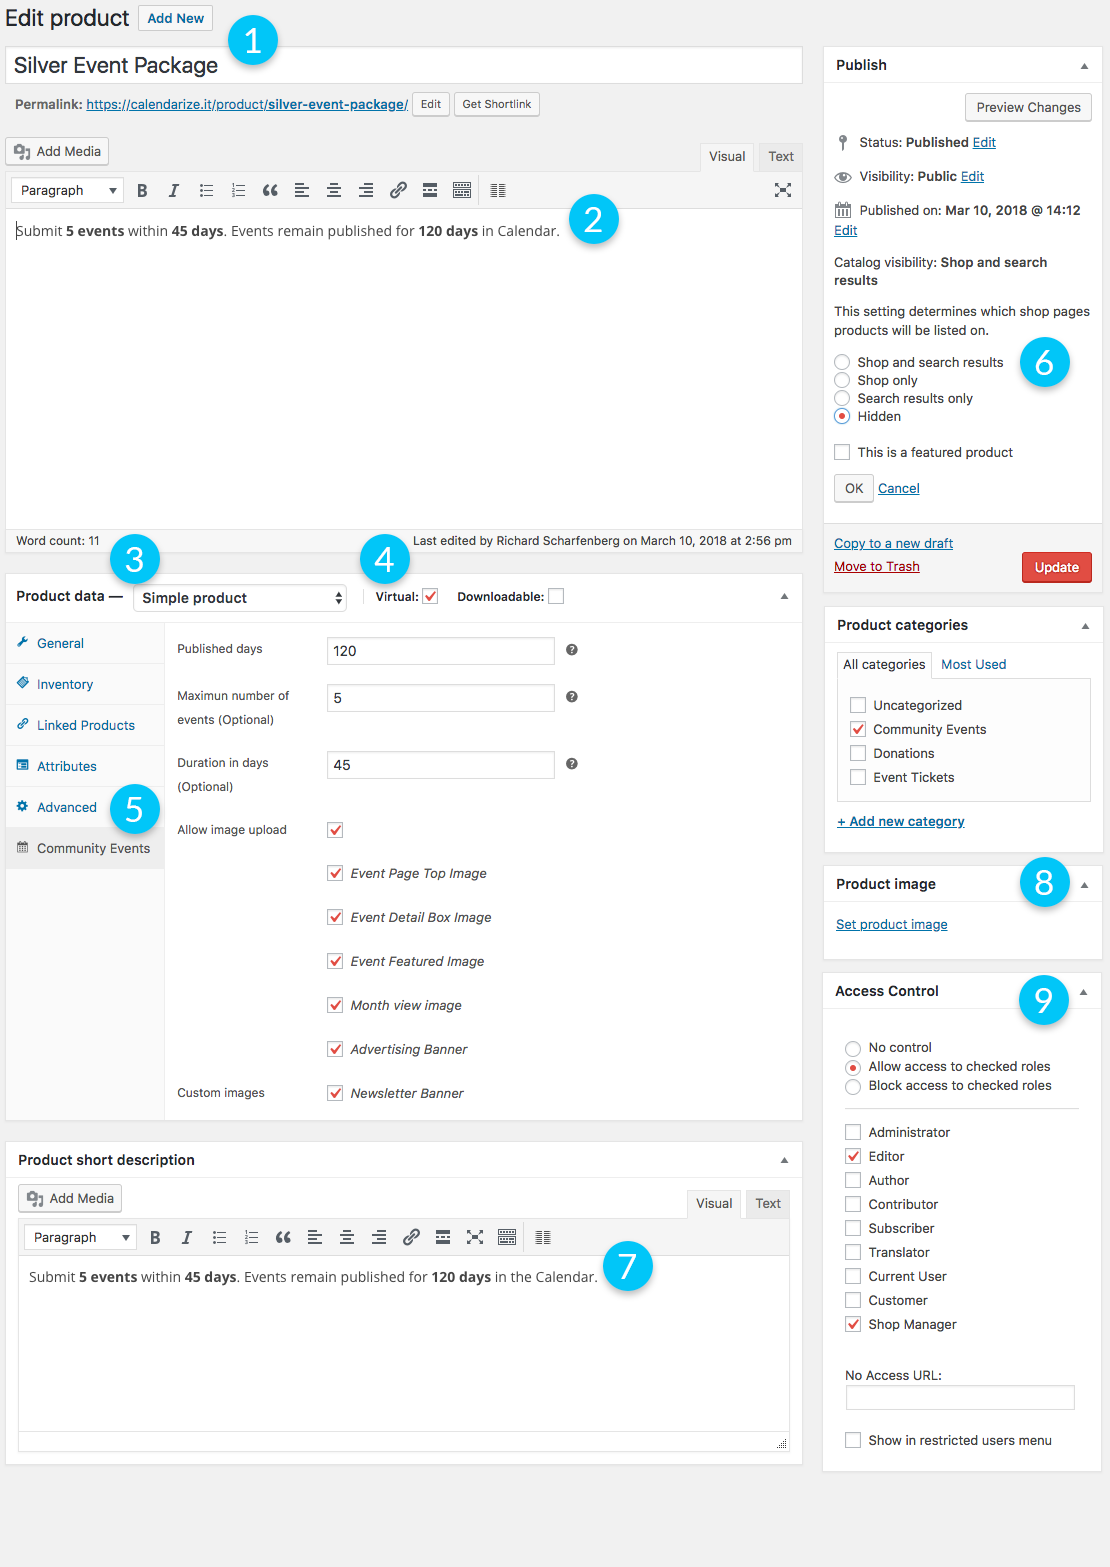
- Go to WooCommerce > Products > Add New
- Enter a short description of the product (only visible if you make the Product visible in the WooCommerce shop)
- Select Simple Product from the Product Type drop-down.
- Select Virtual Product (Virtual products are intangible and are not shipped)
- When Virtual Product is selected the Community Events tab will appear.
Published Days: Number of days the event will be published in the Calendar
Maximum number of events (Optional): Maximum number of events the user can create with this product.
Duration in Days (Optional): Number of days that the user can submit events. If not specified, the user can submit until the maximum number of events is reached.
Allow image upload: If enabled, you can set the images that the user can upload. This includes any custom images that have been created with Community Events. - By default the products are Hidden. This means they will not show up in the WooCommerce shop. You can change this as per your references.
- Enter a short description of the product. Will show in the product box.
- Select a product image. If no image is selected the default will be used.
- If you use the Pages by User Role plugin you can show products based on the visitor’s user role. Useful if you only want a specific user role to see certain packages.
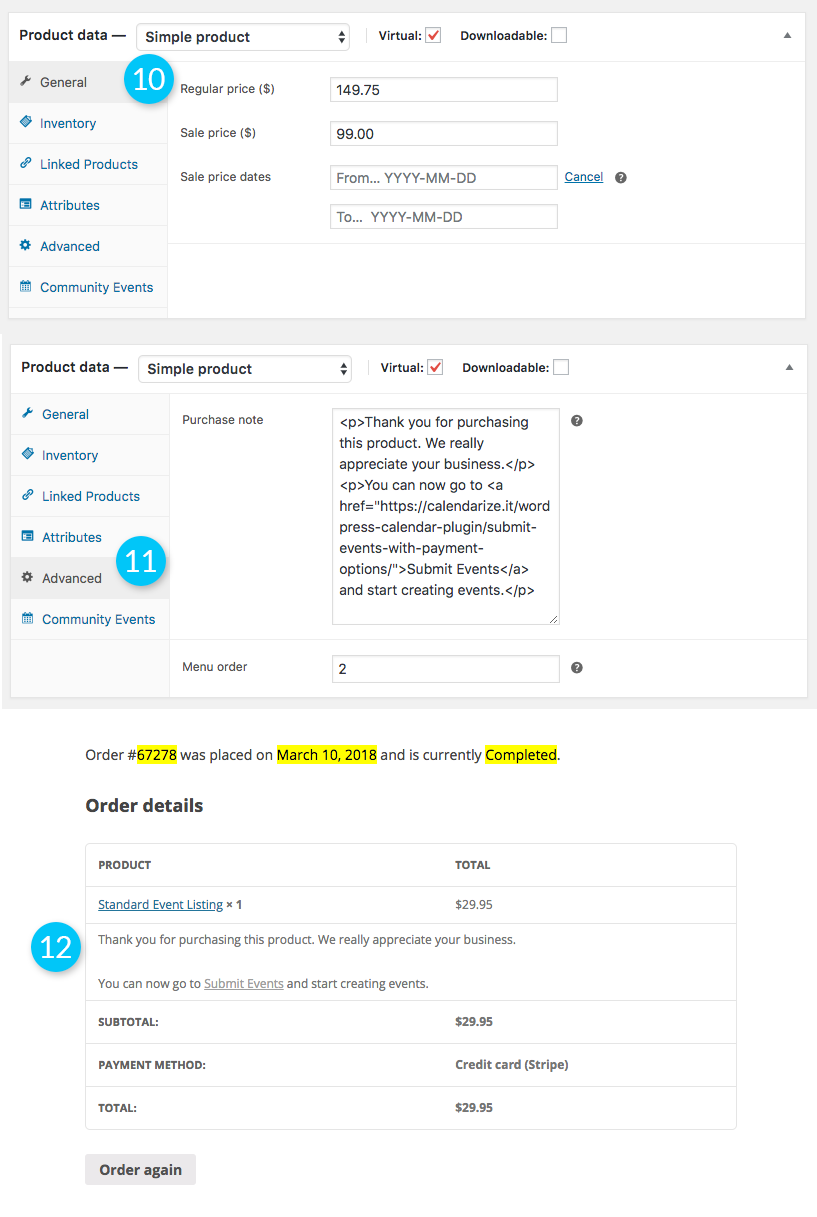
- Set the price for your product. If a Sale Price is set you can also schedule when the sale price should be displayed by selecting a From and To date.
- Enter a Purchase Note to the customer. E.g. you could enter a thank you message and the URL where the customer can start submitting events.
- The Purchase Note to the customer will show in the Order under Shop > My Account > Orders and on the Invoice that is emailed to the customer.


Client satisfaction is our ultimate goal, and we strive for excellence on each and every project. If you are not happy with your purchase or there is something you can’t figure out, do not hesitate to contact us through our Help Center.
Changelog
Version 1.0.4.89130 – April 4, 2019
- Bug Fixed: Products (WooCommerce) are not showing up when the user is not logged in.
Version 1.0.2.83487 – September 6, 2018
- Bug Fixed: WooCommerce tabs filter. The class property was used incorrectly. An array should be passed instead of a string.
Version 1.0.0.83016 – March 2, 2018
- First Release